Fooling Around with Kiwi Trains: Adventures in 3D Modeling & Featuring 1:120 - 1:2 Scale : N, HO, O, G, 5inch, 7.25inch & 15inch Gauges! No Ads, Just Some Nutty Tales from Peter Bryant @ Portland Railroad, Northland NZ If the image has a star on the bottom right corner then its modified with AI and shouldn't be taken seriously.
Showing off another addition to the layout, 3d Printing a 1:24 30ft Steel Van of 1940, this is a simplified version of Neil Wards 1:34 that featured in the journal in recent years.
Stolen the wheels from my only revenue generating stock, the Uk wagon, I am modelling kiwirail...
1:24 3D Printed GE U10b Dh class. Pre-shunters refuge and painted as she came out new. Unsure of her number yet, will have to find out which Dh resided in Whangarei in the 80/90's. For the chassis i'm using a 4 axle power truck, Aristocraft I think.
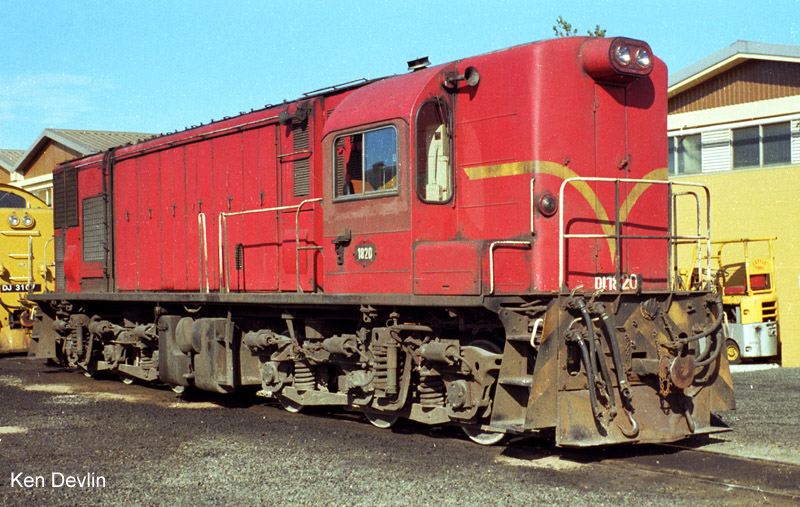
Prototype - Photo by R.Bryant, Early 1996 Whangarei Loco - DH2816, DF6127 & 6058, DFT7158
Prototype -Photo by R.Bryant, 1997 Whangarei Yard, DH2816 Shunting.
1:24 3D Printed GE U10b Dh class
Printer - UP PLUS 2
Quality - Fast
Internal honeycomb structure - second smallest size
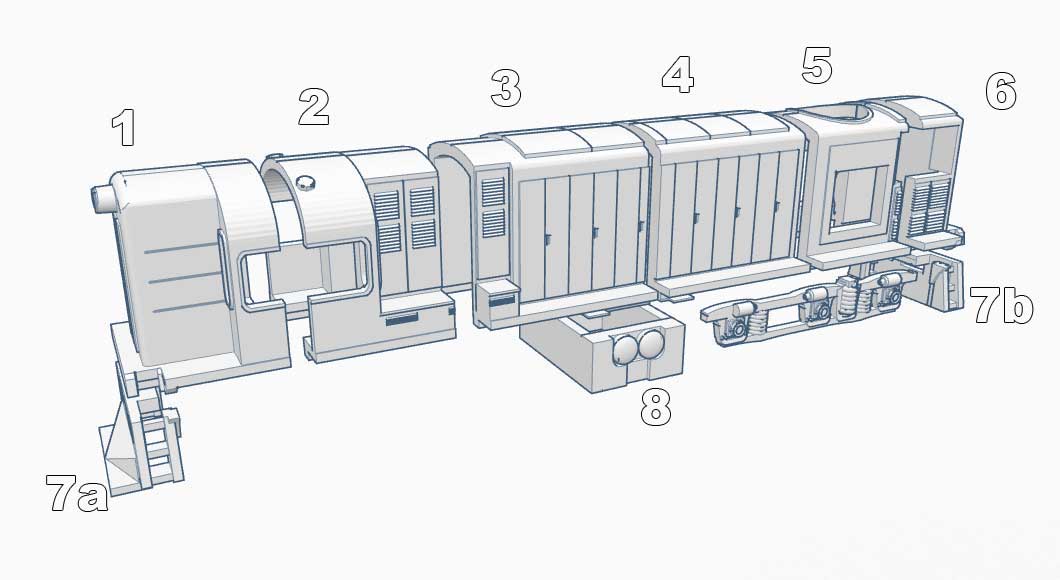
1 024.5g 01hr 31min Res0.2
2 123.4g 07hr 23min Res0.2
3 136.9g 08hr 06min Res0.2
4 170.5g 10hr 06min Res0.2
5 201.1g 11hr 35min Res0.2
6 024.6g 01hr 31min Res0.2
7 048.8g 02hr 52min Res0.2
Total Print Time 43hr 04min
Material Cost 729.8g (less bogies)
3d printed body glued together n painted in "Satin Granite"
3d printed body glued together n painted in "Satin Granite"
After a lick of red and yellow. I've been using cans purchased from Wynn Fraser paints (Don't tell em your painting trains at night time - really bad idea I found..). The brand is "RUST-OLEUM" paint & primer in one, worth $13 a can normally. For the NZR fruit salad scheme i'm using Satin Granite(grey), Gloss Apple Red & Gloss sun yellow. For the modern Kiwirail colours i'm using Lemon Yellow, & Gloss Dark Grey. I still haven't found a match for Kiwirail red, which is quite orange in certain light.
I'm quite keen to do a Da next, in the original scheme. Would look great on the head of a silverstar set!
Printing a Dh in 9mm (1:33.9 scale) for a customer (Centre image), after gluing sections, bogging, sanding & covering with Satin Granite primer/paint it came out quite well. Tempted to print it in 1:64 just to see how the detail might survive..
After adding trucks/bogies, one powered, one dummy.
A wee video of the 1:24 Dh test run, using a similar power block as the dsg, they make a good pair.
Neil Ward kindly let me use his beautifully designed 50ft Carriage 3d files with the purpose of creating a nice rake to run on the future outdoor NZR only layout at portland.
It took just over 1kg of ABS 1.75mm filament for the carriage and details. At least 2 weeks printing & assembling.
The roof needs painting flat black, the rub plates, vestibules & handrails etc still need doing.
Template I made up, I printed Black lines onto black 220gsm paper ($ warehouse stationery 10 pack) using an inkjet printer. Then scored the lines with a razor & metal ruler. Folding & attaching rub plates simple enough.
Vestibules sitting in place, not wanting to fix in place until the roof is finished
Working on the vestibules for the carriage, I've worked the template out on some dodgy card but will pick up something from the stationery shop. The smaller black one is from the old mans scratch built 9mm carriages, about 25 years old.
A long way to go, but still more seats than the Internet Mana party ever had.
First bogie finished, bearings & wheels sitting in place.
Run out of filament with 3 seats to print (not yet attached), an interesting pic before the walls & toilet go in mostly blockiing this view.
Wall partitions printing. All seats in place. I don't think i've seen the man in the pic not using his phone, a sign of the times.
1:24 F & carriage on display for the old man at portland, Roof will be painted flat black when I buy more paint.
And the obligatary topless shot.
A video of the 1:24 Dbr, Di & 50ft Carriage having a short back n forth.
Second 1:24 50ft car body completed
I've spoken to Neil about the possibility of making these beauties to nz120, although by far not his scale. If it could be done & printed locally using Neils Printer I myself would love a set in nz120 :D An exciting future indeed.
2nd Carriage progressing along, 1st batch of people try out the seats, bums need some heavy sanding.
Second 1st 50ft Car creeps forward in progress. Internals all done, Figures all painted by mum. Toilets & fittings added, not to fussed on correctness here as the window will be blanked out. Will look around for 1x2cm mirrors for the toilets, maybe a 2dollar shop will have something. Wheel order arrived in auckland today, so will push 1 or 2 more of these out.
1:24 Di, at this stage using 60 grit sandpaper to do most of the legwork, a small wooden block the size of a deck of cards gives 3 different sized surfaces ideal in for this size job. I've been finishing surfaces with 180 & 200 grit.
1:24 Di, I probably should have tried making the steps thinner, but held off after convincing myself stronger is better in this location. After seeing it in the flesh like this im not so sure. Perhaps after painting & weathering it may not stand out as much.
1:24 locos underway. Dbr now has fuel & battery tanks. DL requires more filler in lots of areas followed by more sanding.
After further work...
Nippon pink springs to mind, so does red wine.
1:24 Di class showing off handrails, which are all 3d printed. Still a few left to do. Also been experimenting with painting the DL cab up as can be seen in the pic.
3D Printed 1:24 DBR Class. The entire body less the bogies & fuel tank, took exactly 1kg of material at a cost of $40 via sandbrooks in auckland, including a time cost of roughly 5 days.
Prototype - Photo by R.Bryant - 1997 DBR 1200
1:24 DBR Class, "sectionalized". If anyone is selling g gauge SD35, SD24, SD7/9's on ebay beware, its going to be chopped up on arrival, huge festival & burning ceremony. bands n everything.
1:24 Wab on left about to receive correct cylinders.
Pretty happy with results thus far, more sanding in places will give it a nice smooth look. Printing of detail parts, cab interior, fuel tank & bogies continue.
After Painting & adding printed details such as handrails & steps., 2mm thick. Longhood top handrails still to print.
Also visible behind the Dbr is a (Lewis Holden) Designed 1:24 scale GSX 20Ft side opening container.
1:24 Dbr
1:24 Dbr, Now with all handrails & showing off the 1:24 50ft Car First Class BPX25175 (Neil Wards Design 4 9mm)
Largest decals i've yet had to print/apply 1:24 Dbr 1200
1:24 Dbr 1200 "the other side/end"
Da control stand on left, dbr on right, many considerations, big handles that might survive printing.
Da control stand, yet to print the Da... I blame the gin.
New drivers meet with senior management, their arms & expression seemingly in a state of disbelief upon learning their fate.
A more fitting control stand for the Dbr, drivers remain in pose of utter disbelief.
Everything in place, and a crew that looks like their being paid.