Fooling Around with Kiwi Trains: Adventures in 3D Modeling & Featuring 1:120 - 1:2 Scale : N, HO, O, G, 5inch, 7.25inch & 15inch Gauges! No Ads, Just Some Nutty Tales from Peter Bryant @ Portland Railroad, Northland NZ If the image has a star on the bottom right corner then its modified with AI and shouldn't be taken seriously.
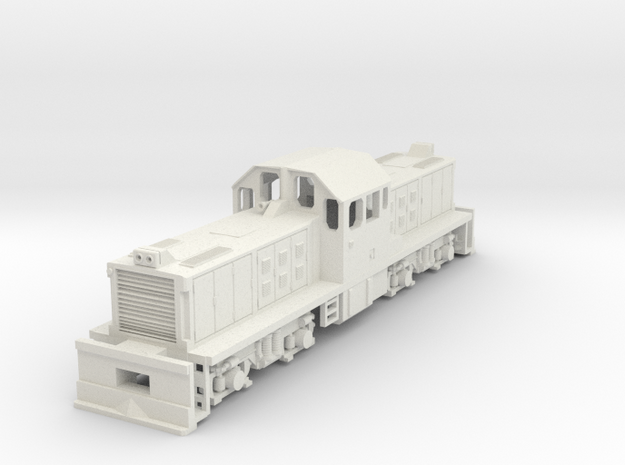
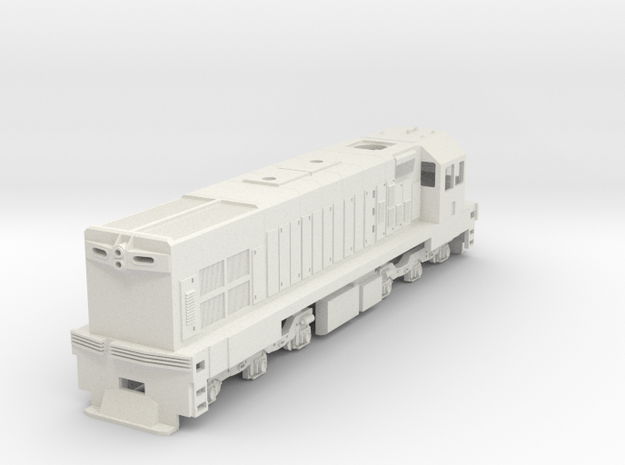
After many delays & other locomotive projects getting in the way the DX in its original form gets priority. This time things are different with the UP Box printer up and running, I can print larger sections now & after some test prints one can presumably assume nice warp free prints, time will tell of course. knowing this I've designed the loco in sections, the chassis, nose, cab & main body will be printed and assembled separately, allowing for slight variations across the board.
At this point the front cab door will also print separate, allowing for it to be fixed it in place or make add a hinge using fine wire, which I think could even be achieved in nz120, for 1:24 I anticipate no real issues.
A quick print of the Cab & door, as suspected its rather simple assembly, even the door latch works..
Yes, hes literally glued to the phone..
More sections finished
Getting closer
Thus we rush boldly forth into functionalism madness, festina lente
Panels close and open, I ended up using 0.5mm brass wire for the hinge. Very snug fit.
Doors open, not sure why I primed the Cab, as this will be reprinted.
It's at this point i'm kicking myself for not printing the side doors on the engine section, I may as well print a phase 1 Dx, and will include the feature. I might still at least print the top part of the engine for the current loco
Not long before we get to see my take on a GE (Ordered through the National Electrical and Engineering Co Ltd, Part of the Cable-Price-Downer group) v12 2750hp diesel power plant poking through under the engine hood. Since everything comes apart I'm saving heaps of time & coin on masking tape.
No sanding or cleanup at all, removed the support material, a quick spray with Tamiya Fine Primer then allowed to touch try 2 minutes before it was fixed to position. Couldn't be happier.
The orange however is simply too dark, Rather the running board edge has the correct tinge of the ginge.
It took 4 coats to find the right shade, $14 each time, but worth it.
This time the top panels have slightly thicker hinges, held to the body by 0.5mm brass rod in a staple like fashion. And of course the addition of side service panels. I'm still experimenting with the exact hinge method to be used here.
2nd Dx Longhood, cab & nose mostly done, orange section is just a place holder until that section prints. In fact just to complicate things why not have the doors open to reveal stacks of batteries, of which i've no picture nor have I ever seen em in person.
Final colours
Best photo I have of the actual prototype, picture taken indoors, so gave me the best indication. Picture is copyrighted, borrowed from "NZ Railway Historical Group"
It took a good week to install a reliable working side door panel, and 20 minutes to install the rest. Drilled a 0.56mm hole through the body & into the 2mm wide door, and installed 0.51mm brass rod to act as the hinge.
Engine printed & installed
Second 1:24 Dx mostly printed, just need to reprint the front hood, the control stand as it first made an appearance, the actual controls will be free moving.
After more painting its starting to look very sharp, need to think about glazing & lighting
More lights added
Early morning shot, The handrails are not glued, but rather can be removed in order to remove front, rear hood & cab
This week I finally went ahead with the purchase of a UP Box from https://3dprinting.co.nz/. The printing capabilities are a few steps up from the UP Mini & UP Plus 2. The print box is now 250x200x200 making more ambitious prints viable. The finest layer on the UP Mini is 0.2mm. & the UP Plus 2 being 0.15mm. The UP Box is 0.05mm!
Saturday 7am, More test printing of domes & cylinders & various sizes.
An earlier test print @ 0.10mm layers, the Ww cab interior detailing.
The main siderods were printed as a 1 piece, previously having to print in 2 pieces but finding it too fragile to run without breaking. I also reprinted all 8 pony truck wheels with bigger flanges @ a print layer of 0.05. I didn't even have to sand or clean up, very smooth prints.
After going through grandfather's photo album on J's & K's I found a few relevant pics handy for detailing I may as well share, rather than keeping them hidden away.
Interestingly the streamlining was removed 1948 - 49 when the A C F I feed water heating apparatus was removed. Kb were built at hillside (not Hutt) and were fitted with a booster two-cylinder auxiliary engine which could be cut in at low speed for starting or heavy grades.
Using 4 Wheels, 1 motor & gearbox on permanent loan from
2x Bachmann anniversary 4-6-0 $50 chassis blocks. I've used the pony trucks, I had to shorten the front truck & solder things back together. I've then 3d printed a Ka around it.
I'm usually shy when it comes to taking photos of its underside as my detail is somewhat lacking, but I think its interesting enough in this case.
The boiler needs a few more passes with the sandpaper, then detailing can begin.
Bachmann anniversary 4-6-0 wheels, motor & gearbox
First Run
1:24 Ka hauling 3x 50ft'ers, 2 carriages now have the handrails added. Need to add more weight for traction, Currently 3kg
Early morning run Poem from Frank Robert's book, "Steam in Miniature"
I love to see the K arrive, So well controlled, yet so alive. I feel the shaking, quaking ground, Awaremess of approaching sound. Hear the clattering, puffing snifter, As the driver shuts the drifter. Then the greedy rushing suction, What a racket, what a ruction! Clanging rods with ringing steel, Grinding brakes on rumbling wheel. All to me makes such appeal, I wonder oft what others feel.
Last night while reading Frank Robert's book, "Steam in Miniature" I found a picture of the inner cab of K 900 & 916, which is not exactly a Ka but is better than nothing. I thought I'd share this picture from the book as its a valuable modeling aid, he very much set the standard high. I do wonder what he'd say to the modern methods I employ....
Boiler blackhead so far.. Yes this will be available seperatly for nz120 once finished, obviously scaled down with considerations made. I've designed it so I can put a $12 fire flickering Led inside the firebox & it will shine through. Going to use the clear pipe from a ballpoint pen that holds the ink for the water level gauges. Just to be clear, my Intent is to eventually print the correct one for the Ka with the butterfly firebox doors, might even make the doors functioning. I promised myself I would print a Dx next but since I've finally got a good cheap source of crucial working parts for the powered mountain chassis, and the ability to print the chassis at any axle spacing I desire, I may as well print the K.
On a whim, while ordering parts from Bachmann I stumbled upon a small 0-4-0 powered chassis for $30USD. I figured it would come in handy for something. Only 1 wheel is powered by the motor so side rods were a given. Now the wheels are smaller than scale, and I haven't any more small wheels until the next order so it will remain without its rear pony wheels for a while longer.
Eventually the cab & water tanks will be painted green to match #5 at the Maunu Museum in Whangarei.I was inspired enough to even print a small covered wagon
Whangarei Heritage Park Peckett #5
Peckett's first Powered Run
Painted to match #5, the blue carriage is coming along nicely, it would be a shame to not have the second carriage.
K & Peckett for size comparison
The 4 wheeler carriage now has steel free running wheels, kindly donated by a recent Marklin 4 wheeler carriage purchase from https://www.constellationhobbies.co.nz/ The brake rigging was also good, so had to cut them off also, the quality of Marklin stuff is amazing.