Friday, 30 August 2013

DQ, W Wagon & Pulk Powder Prints Arrive

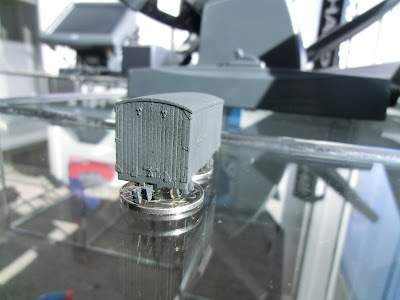
Today sees the arrival of NZ120 DQ Class, 4 W Wagons & 2 Bulk Powder wagon loads.
I prepare a bath of hot water in a used Ice Cream container with a drop of wish washing detergent.  The model allowed to soak for a moment & proceed to brush the model with tooth brush & paste dipping the models in water every now and again as I work over every surface. 
I dry them by blasting air via a compressor then sit the models under a heat lamp for a few minutes.
A couple of coats of plastic primer later and its ready for painting.

Links to models mentioned
4 Wheeler
DQ
Bulk Powder container load


NZ120 DQ

NZ120 DQ

NZ120 DQ (Frosted Ultra Detail)

NZ120 DQ (Frosted Ultra Detail)

NZ120 W Wagon's (Frosted Ultra Detail)

Bulk Powder Container Loads (Strong & flexible)

Bulk Powder Container Loads (Strong & flexible)


Wednesday, 28 August 2013

NZ120 DC Class after handrails

Last night the NZ120 DC class received handrails, so the model "crew" can remain "safe".

The wire is 0.4mm purchased from the local model shop. I drilled into the body, and then put a dab of superglue into the hole and then inserted the handrails. 
This system ensures the handrails wont break off as easily!


Saturday, 24 August 2013

9MM NZR ,O (Only) Gauge


The old man handed me some 9MM Von Strapp kits today, and what a contrast to NZ120! 
2x Yb-2 Von Strapp W/M kits & 1x Xa-6 Fruit Wagon body only Kit.

When I get my hands on some solder I shall assemble the Yb's, will need to get my hands on some track lengths & sleepers from Woodworks http://www.woodsworks.co.nz/ and lay some track!

Fruit Wagon Body

Yb, with NZ120 W Wagon sitting inside for comparison of the 2 scales!

9MM Couplers, hooks. And lots of fine sanding!


Underframe Parts

A slow but rewarding process..

Further progress..

Wednesday, 21 August 2013

NZ120 & NZ64 EF Update

The NZR/Kiwirail EF Class revisited. Updating of the model to "current" standards. No Handrails or airhoses, although the holes on the ends are preset for both.
The Top Detail is now added, except for the actual pantograph (See pics).
I've now added bogie sideframes.

 The available material is now only Frosted Ultra Detail for NZ120. But also Strong & Flexible for NZ64 Scale.


NZ120 Scale EF
NZ64 Scale EF


Actual Prototype picture sourced from google
Image credits to:


DBR Bogie Sideframes

A quick post showing a little bit of progress with the current NZ120 DBR design, as in the bogies at least.

DBR bogies

Sunday, 18 August 2013

Main Shelf layout Spiral & Helix, Weekend effort.

Main Shelf layout Spiral & Helix, Weekend effort

Video of 3d Printed Db pushing Trackgangproducts Yc's & La with 3d Printed W Wagon & workers back down after an evenings work.

The Challenge;

Extending the layout to the upper shelf, requiring a 3 level spiral then a 4 level helix, 1cm height for every 35cm in length.


This is where its going to sit. Enabling me to extend the layout similar to lower level. Upper level I would like a station yard & a larger post 70's loco shed to store my nz120 locos.
The spiral undergoing construction, Peco Flexi Track is used. Not glued down, track is only held down by clips, Will attach track by screws (3 per level to allow for natural track expansion)

3d Printed DA with 3 white metal 56' carriages. perform countless tests to assure its actually going to work in practice! Turned out No Probs!

Helix Preparation, ya really need to get the maths correct at the start!
Helix Construction, getting funky with a jigsaw & very fine blades!
The Helix all cut & ready for the next stage, supports..
Also showing a quick tool constructed to ensure accuracy & make the job a little easier!


Progress on the Helix assembly.

Showing the spiral @ the bottom & helix attached. Only 2 lengths of flexi left till monday Grr!

Showing bottom unitrack link.

Showing typical Flexitrack connection, This photo shows the track on a new connection to the Helix, even the best planning can't prevent oversights. However being able to identify & fix the problem is what truly matters! 


W wagon & Db Part 2

A quick post to show off progress on the W wagon & Db Class. Note the Corona bottle cap to give an idea of the scale! The db is currently getting a good cleanup with Tamiya Finishing Abrasive paper. I've also purchased 0.2 Piano wire for the handrails, using fine drills to drill into the nylon model & a touch of super glue will ensure a tidy & robust job.

Not to forget, the W Wagon Plans can be found in NZ Model Journal - September 2012 of which are available in the scales nz120, nz64 & 1:87 (HO) and as always loads of reference photo's! If you haven't yet resubscribed for the magazine or need to order backissues then head to http://www.nzmrg.org.nz/index.html


Still a bit to go on the W wagon, The door lock mech should be easy enough to scratch build with styrene & brass wire! For the brake lever I will use trackgangproducts detail parts.
Top View

Looking from the rear!

Df (Scratch built using dandruffs df in a day technique) Dft (Trackgangs) & DL class (Shapeways FUD)

Monday, 12 August 2013

W Wagon & Db Prints Arrive

Showing off 1 week later 2 designs, designed - printed - delivered under 1 week. I have to say I'm impressed to see the quick turn around. The quality of the prints is somewhat great! These photos were taken after I first scrubbed the models down with a toothbrush & toothpaste then rinsed under the hot tap & blowing down via the air compressor then repeated until all the oil was removed. I then primed the model. 

The W wagon doesn't require brass bearings, simply fitted 2 Wheels & Couplers from trackgangs. Its quite freerolling so worth me getting some more for the steamers to tug around.

Sitting on an Atlas SD-7. The bogie sideframes are half a mm to low.. might have to redo then add bogie detail, brake linkages etc.

*Updated, now painted & rolling around the layout.. The perfect holes for the wheels mean no fiddly bearings. simply pop the wheels in,  perfect alignment of wheels & no derailments gives me confidence to invest in a decent rake for the steamers!


The Db Class turned out quite a stunner, couplers, airhoses & airhorns so far..

I can't find any #8 wire to attach so may as well go with the fine wire then its painting, I intend on red with white stripes. 


Wednesday, 7 August 2013

1:64 QR


The QR Class, designed on request for the guys over the ditch. I do like locos with a raised front hood, after having just completed the DB class the DQ followed a similar design process making it a rather tidy job overall. No airhoses or anything too fancy but the headlights and windows on the cab have smoother curves and the windows have a raised lip surrounding the window.


Showing left hand side


Showing right hand side


Tuesday, 6 August 2013

Bulk Powder Container Loads

Tonight is a simple challenge, producing a Bulk Powder "Container Load". Fortunately I had the NZ Model Journal - March 2013 of which had nz120 & nz64 plans with loads of reference photo's. More Here http://www.nzmrg.org.nz/index.html

The ribbing shouldn't make it given the printer tolerance, also the only material made available is Strong & Flexible Polished, making hopefully smooth sides. But a test print will show the results.

I'm rather tempted to add lots of detail, but the small detail parts might lead to issues so smooth it is!

https://www.shapeways.com/shops/kiwitrains?sort=newest


Silver Fern

Things have been rather busy in the last month, I ended up getting my hands on a 7.25" gauge silver fern that appeared on trademe. The ...